Workshop Ergonomics Guide: Stools, Benches, Mats, and Storage Placement
Quick Answer: Build an ergonomic garage workstation around the task and the person, not around one “ideal” bench height. Put the work close enough to keep the shoulders relaxed and the wrists near neutral, raise or lower the work surface when force or precision changes, and keep frequently used tools inside an easy reach. Pair the bench with a stable stool that fits both the user and the task, a mat that stays flat and does not create a trip edge, and storage that keeps heavy items near waist level. Change position regularly; a good stool, mat, or organizer cannot compensate for hours in one fixed posture or for a bench that forces bending and long reaches.
Workshop ergonomics is the fit between a person, a task, the tools, and the space. It is not a promise that one product prevents pain, and it is not a medical treatment. A weekend woodworker sanding a cabinet door, a car owner working at wheel height, and a maker assembling small parts need different surfaces, reaches, seating, lighting, and storage. The useful question is therefore not “What is the perfect workstation?” but “What can be adjusted so this specific task requires less force, less reaching, less bending, and less time in one position?”
This guide joins the choices that are usually considered separately: shop stools, workbenches, garage floor mats, lighting, and storage placement. It provides a repeatable setup and audit process without claiming that My Garage Products designed, tested, or certified any installation. My Garage Products is a discovery site; it does not sell or ship products, provide warranties, authenticate sellers, process returns, or replace the instructions for a bench, stool, mat, tool, or storage system.
Start With the Task, Not a Furniture Catalog
| Workshop task | Work-surface starting point | Seating or support | Storage priority | What to watch |
|---|---|---|---|---|
| Fine assembly, measuring, soldering, or inspection | Bring small work nearer the eyes while keeping the shoulders relaxed | Adjustable stool with stable foot support when seated | Small tools and parts in the primary reach zone | Neck flexion, unsupported forearms, glare, and tiny parts beyond easy reach |
| General bench assembly and repair | Near relaxed elbow height as a trial position, then adjust to the actual tool and workpiece | Alternating standing and supported sitting | Daily tools between roughly knee and shoulder level | Raised shoulders, bent wrists, repeated twisting, and clutter at the bench edge |
| Forceful pushing, planing, clamping, or disassembly | Lower than precision work so the user can apply force without lifting the shoulders | Stable standing stance; stool parked outside the force path | Clamps and heavy tools close to the task and securely supported | Workbench movement, overreaching, rounded back, and casters that roll unexpectedly |
| Brake, wheel, detailing, or low vehicle work | Move the person to the work with a suitable low seat rather than folding at the waist | Low-profile stool or creeper seat matched to floor and clearance | Small mobile tray or nearby cart within the task envelope | Pinch points, sloped floors, caster stops, and repeated floor-level lifting |
| Standing sorting, packing, or repeated parts handling | Keep containers elevated and tilted toward the user where safe | Position changes, foot support, and a suitable resilient standing surface | High-frequency parts close and centered; reserve stock outside the prime zone | Static standing, deep bins, sharp mat edges, and one-sided reaching |
The table offers starting principles, not fixed dimensions. Body size, footwear, tool geometry, workpiece thickness, visual demand, force, duration, and mobility needs all change the useful setup. An adjustable surface is helpful only if the adjustment range actually reaches the user’s tasks and if changing it is practical enough to happen.
Map One Complete Work Cycle
Choose a real project and watch one complete cycle: collect the workpiece, retrieve tools, perform the task, inspect the result, put tools away, and clear waste. Count every bend, long reach, overhead reach, twist, trip around furniture, and time a heavy object moves from floor level. The repeated motion often matters more than the dramatic motion that happens once.
NIOSH’s current ergonomics risk-factor guidance identifies force, repetition, awkward posture, contact stress, and time in static postures as relevant conditions. Use those categories as an observation checklist. Record intensity, frequency, and duration rather than declaring a posture automatically safe or unsafe from a photograph.
Make a simple reach map while standing and while seated. The primary zone is the area reached with the upper arms near the torso and without leaning. Daily tools, controls, and active parts belong there. The secondary zone can hold items used once or twice per project. Reserve high shelves, deep cabinets, and floor-level locations for light or infrequently handled items that can be retrieved without a hazardous climb or awkward lift.
Set Bench Height for the Work You Actually Do
Begin with the work—not the bare benchtop—near relaxed elbow level for light assembly. Place the actual fixture, vise, tray, or workpiece on the surface, because its thickness changes hand height. Then simulate the task. If the shoulders lift, lower the work or support the forearms where the task permits. If the back and neck bend forward to see detail, raise or angle the work, improve lighting, or use magnification rather than simply hunching closer.
Forceful work generally benefits from a lower work point than precision work. A lower surface can let the user keep the shoulders down and place body weight over the task. It must not be so low that the trunk remains bent. Precision work can be raised toward the eyes, but the forearms or workpiece may need support so the shoulders do not stay elevated. There is no single number that solves both tasks.
OSHA’s current ergonomics control guidance recommends repositioning work tables to eliminate long reaches and enable neutral postures. Its technical manual also notes that workstation configurations can force bending and recommends elevating or tilting bins rather than reaching deeply into them. These are workplace sources, not residential design codes, but the principles translate well to a garage: bring the task toward the person before asking the person to lean toward the task.
A fixed-height bench can still serve different jobs. Add a stable removable platform for light precision work, a properly secured vise at an appropriate height, or a task-specific fixture. Use a suitable sit-stand stool for long, low-force tasks. Do not improvise a work-height riser from loose boxes, stacked pails, unstable scrap, or a surface that hides the bench’s load path. Compare bench formats in the Workbenches collection, then verify the manufacturer’s height, stability, anchoring, caster, and load instructions for the exact model.
Check Bench Depth, Legroom, and Stability
A deep bench is useful only when the back portion is accessible without repeated leaning. Move current tools and parts toward the front and center. Put reference materials, chargers, and infrequent supplies at the rear only if their cords, heat, and clearances are handled safely. A narrow shelf or wall rail can free the work surface, but projections must not interfere with the user’s head, hands, or workpiece.
For seated work, reserve knee, thigh, and toe clearance beneath the active position. Under-bench cabinets can add storage while forcing the stool too far away, which turns every reach into trunk flexion. A movable drawer unit or a clear center bay may work better than filling every cubic foot. Keep foot controls and cords away from the caster path.
Before applying force, check that the bench is level, stable, assembled as specified, and suitable for the load and direction of force. Lock manufacturer-provided casters when required. A wheeled bench that is convenient for layout may be wrong for heavy clamping unless the maker specifically supports that use. Keep the force path away from a stool that can roll, tip, or become trapped between the user and the bench.
Choose a Stool as Part of the Station
A stool should position the user at the work without raised shoulders, dangling feet, a sharp seat edge behind the knees, or a long forward reach. Measure the loaded seat-height range rather than relying only on the advertised maximum. Confirm that the adjustment remains secure, the base fits the floor space, and the rated capacity applies to the exact configuration.
When the stool is high, a foot ring or separate stable foot support gives the legs somewhere to rest. It should not force the knees too high, block the approach to the bench, or create a place for cords and shoes to catch. A backrest can help during supported, low-force tasks if its height and shape fit the user; it may obstruct frequent turning or close access during a brief mobile task. The backrest versus backless stool guide covers that choice in more detail.
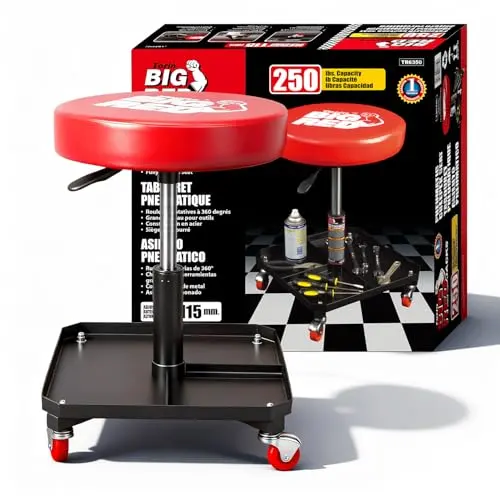
Rolling stools suit smooth, level floors and tasks that genuinely require short movements. Stationary stools can provide a more predictable base for work near machinery, slopes, cracks, floor drains, or forceful actions. Casters must match the surface and remain clear of fasteners, chips, cords, mat edges, and vehicle tracks. Use the rolling versus stationary comparison for mobility decisions and the low-profile mechanic stool guide for wheel-height tasks.
Capacity is more than the user’s body weight. Tools carried on the seat, leaning force, a side reach, impact from sitting, and loads in a lower tray can affect stability or exceed instructions. The shop stool capacity guide explains the complete-system check. Never use a stool as a step, work platform, jack support, or substitute for equipment the manufacturer specifies for elevated access or vehicle support.
Use Mats to Support Standing Without Creating a New Hazard
A resilient mat can improve comfort for some standing tasks, but it does not fix a bench that is too low, a tool that requires excessive force, or a workflow that keeps someone static for hours. OSHA’s technical manual lists resilient mats, footrests, adjustable chairs or stools, and opportunities to change position as possible responses to prolonged standing. The important word is “and”: combine surface choice with posture change and workstation adjustment.
Choose a mat for the actual environment. Check size, thickness, edge shape, slip resistance, chemical and moisture compatibility, cleaning instructions, temperature range, and whether wheeled stools, carts, or equipment may cross it. Beveled edges can reduce abrupt transitions, but the mat still needs to lie flat and remain where intended. A soft surface that catches a caster or compresses unpredictably may be unsuitable under a rolling stool.
Keep the mat out of the vehicle tire path unless it is designed and positioned for that use. Do not bridge cords or hoses beneath it, hide a wet floor, cover a damaged surface, or overlap mats to create ridges. 29 CFR 1910.22 applies to places of employment, but its housekeeping principles are sensible for any shop: keep walking-working surfaces orderly, maintain floors as clean and dry as feasible, remove protruding or leaking hazards, and inspect and correct unsafe surface conditions.
The Garage Floor Mats collection includes several intents, including vehicle containment and floor protection; those are not automatically ergonomic standing mats. Verify the purpose and instructions for the exact product. A large parking mat can protect concrete while being the wrong size, edge, or resilience for a small standing station.
Place Storage to Reduce Lifting, Bending, and Twisting
Store the heaviest frequently handled items around waist level when the space and product instructions allow. Keep routine hand tools and parts between about knee and shoulder level. Move light, rarely used objects upward; move reserve stock outward. Avoid making the floor a permanent shelf. Floor storage encourages bending, narrows the stance, interferes with cleaning, and can move into a vehicle or caster path.
Keep the active tool group close to the task. A wall panel, shallow drawer, or small parts organizer should reduce motion, not create an attractive display across the room. The pegboard layout guide explains primary reach, removal clearance, retention, and load planning. Use Small Parts Organizers for divided hardware that must remain separated, and Garage Tool Storage for cabinets, racks, and mobile units that keep larger tools supported.
Do not fill every space beneath or above a bench. Knee clearance, head clearance, task lighting, clamp access, ventilation, and a direct exit path are functional assets. A shelf above the station should not put heavy or sharp objects over a seated person. Deep bins should come forward, tilt, or use removable trays so the user does not repeatedly bend and reach inside. If a bin must be lifted, place handles where both hands can grasp them and split the contents when the load is awkward.
Plan a return path. Each high-frequency tool needs a location that can be reached while the body remains oriented toward the bench. Labels, outlines, or divided trays are helpful when they shorten searching and make missing items obvious. They are not useful when the designated location requires a twist, a high reach, or a precise balancing act every time the tool is put away.
Keep Lighting, Airflow, and Power From Undermining the Layout
Poor lighting encourages the head and trunk to move closer to the work. Use general light plus task lighting positioned to limit shadows and glare. Mount or clamp fixtures so they cannot fall into the task and so their cords do not cross the work surface. The Garage Lighting collection can help compare formats, but illuminance, color, glare, electrical installation, clearance, and environment suitability must be checked for the specific work.
Thermal discomfort also changes posture and concentration. Use the Workshop Comfort & Climate hub to plan heating, circulation, lighting, stools, and mats as connected systems. A garage fan may improve circulation or personal cooling, but circulation is not the same as outdoor air exchange or source capture. Do not aim a fan so it spreads dust, vapors, or hot work byproducts through the occupied zone.
Power must follow the work without becoming a trip or overload problem. Position receptacles, chargers, and reels so cords do not cross the primary stance, stool path, or mat edge. The Garage Power, Cords & Reels hub connects extension-cord, reel, lighting, charger, and heater decisions. Never make the ergonomic setup “cleaner” by routing cords through pinch points, under mats, across hot surfaces, or where a caster can damage them.
Alternate Posture Instead of Chasing One Perfect Position
A neutral posture can still become tiring when held without movement. NIOSH notes that extended static posture can add muscle fatigue and disrupt blood flow even when the position begins near neutral. Arrange the station so standing, supported sitting, and brief walking are all practical. Place the stool where it can be used without rearranging the entire shop and where it can be parked clear during forceful work.
Change the task as well as the posture. Alternate detailed hand work with material preparation, inspection, cleanup, or another activity that uses different movements. Short, frequent resets can be more practical than waiting until discomfort forces a long stop. No schedule fits every person or task, so use early fatigue, loss of precision, repeated fidgeting, numbness, or discomfort as signals to stop and reassess rather than as proof that a product has failed.
Persistent pain, numbness, weakness, swelling, or symptoms that do not improve with rest deserve advice from a qualified health professional. This article cannot diagnose a condition or prescribe a workstation for an injury, disability, or medical restriction.
Run This Nine-Step Workshop Ergonomics Audit
- Select one task: Define the workpiece, tool, force, visual demand, duration, and normal cleanup rather than auditing the room in the abstract.
- Observe a complete cycle: Count bends, reaches, twists, overhead handling, floor lifts, stool movements, trips around furniture, and time held in one posture.
- Set the work point: Adjust or fixture the work so the shoulders can relax, wrists stay near neutral, and the user can see without sustained neck or trunk bending.
- Clear the approach: Provide stable footing, knee and toe room, clamp access, and a direct path to and from the bench.
- Fit the stool: Check loaded seat range, foot support, backrest role, base, casters or glides, capacity, floor compatibility, and parking location.
- Evaluate the mat: Confirm purpose, resilience, flatness, beveled transition, slip resistance, cleaning, chemical compatibility, and caster interaction.
- Zone the storage: Put frequent tools in easy reach, heavy routine items near waist level, light reserve items farther away, and loose hardware in suitable divided storage.
- Resolve light, air, and power: Reduce glare and shadow, keep airflow appropriate to the hazard, and route cords away from feet, wheels, heat, and sharp edges.
- Test and revisit: Complete the task, ask what still causes leaning or force, change one variable, and repeat after new tools, projects, or symptoms alter the fit.
Connect this station-level audit to the broader garage storage zone plan. The best bench arrangement can still fail if a vehicle blocks access, household storage migrates into the stance area, or the main material path crosses a door, stair, heater, or parking lane.
Reject the Setup When Any of These Remain
- The bench height is treated as universal even though force, precision, workpiece thickness, and user size change.
- The user must bend the trunk, lift the shoulders, reach across the bench, or twist for a repeated step that could be repositioned.
- Under-bench storage blocks the knees and forces the stool away from the work.
- A stool lacks a verified capacity, stable base, secure adjustment, suitable foot support, or floor-compatible casters or glides.
- A wheeled stool or bench can move during forceful work, or a mat edge catches its casters.
- The mat curls, slides, hides moisture or damage, overlaps another mat, or creates an abrupt transition in a walking path.
- Heavy routine items live on the floor or overhead even though a safer mid-level location is available.
- Sharp or heavy storage sits above a seated person, vehicle, battery, glass, or finished work.
- Cords, hoses, stool paths, and mat edges cross one another in the primary stance or exit route.
- Lighting, airflow, or thermal discomfort repeatedly drives the user into a strained posture.
- The arrangement depends on standing or sitting without practical opportunities to change position.
- A symptom is being treated as a shopping problem when professional medical evaluation is appropriate.
Frequently Asked Questions
What height should a garage workbench be?
There is no universal height. Begin with the actual work near relaxed elbow level for light assembly, then lower the work point for forceful tasks or raise it for visual precision while supporting the arms as needed. Include the vise, fixture, tray, or workpiece thickness in the measurement. Test the posture with the real tool before committing to a fixed height.
Is standing always better than sitting in a workshop?
No. Standing can help mobility and force application, while supported sitting can reduce lower-limb load during precise or prolonged low-force work. Either can become fatiguing when held too long. A useful station makes both positions practical and keeps forceful work separate from a rolling stool.
Do I need an anti-fatigue mat?
It may improve comfort for a standing task, but first correct work height, reach, force, footwear, floor condition, and time in one posture. Choose a mat that lies flat, suits the environment, can be cleaned, and does not interfere with casters or walking. Vehicle-containment and floor-protection mats are not automatically standing mats.
Should a shop stool have a backrest?
A fitted backrest can support low-force seated work, especially when the task lets the user sit back. A backless stool can make short transitions and close access easier. Decide from the task, adjustment range, foot support, stability, turning needs, and how often the user can change position—not from the backrest alone.
Where should heavy tools be stored?
Keep frequently handled heavy items near waist level when the storage system and space support that placement. Avoid repeated floor lifts and overhead handling. Verify the shelf, drawer, wall system, fasteners, floor, and container capacity as a complete load path, and use two people or suitable handling equipment when an item is awkward.
How close should tools be to the bench?
Daily tools should generally be reachable without leaning or twisting from the normal task position. Tools used less often can move to a secondary zone. Preserve enough clearance to grasp, remove, use, and return each tool safely; maximum storage density is not the goal.
How often should I redo the ergonomics audit?
Recheck after adding a major tool, changing the primary project, moving the bench, replacing the stool or mat, or noticing repeated fatigue or discomfort. Also inspect the station periodically for loose hardware, worn casters, mat curl, storage creep, blocked legroom, damaged cords, and changes to lighting or traffic.
Final Verdict
A workshop feels better when the task sits at the right place, not when every catalog category is present. Start with one repeated job. Bring the work closer, set the surface for the required force and precision, keep the shoulders and wrists near neutral, preserve legroom, fit a stable stool to the floor and bench, and use a mat only when it stays flat and supports the actual standing task.
Then place storage around the workflow: frequent tools in easy reach, heavy routine items near waist level, loose parts in divided organizers, and light reserve stock outside the prime zone. Connect the station to lighting, airflow, and power without creating glare, dust movement, heat, or trip paths. Most importantly, make changing position easy. The strongest ergonomic improvement is usually a system of small, testable adjustments—not a single stool, bench, mat, or organizer presented as a universal answer.