How to Stop Pegboard Hooks From Falling Out
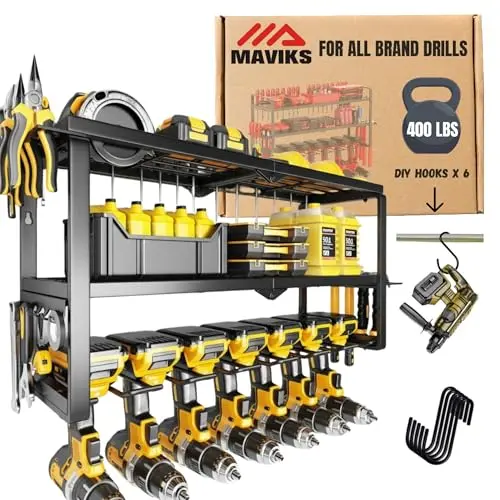
A pegboard hook usually falls out for one of four reasons: it does not match the panel, it lacks rear clearance, the stored item is lifted at the hook-removal angle, or the system needs a compatible retainer. Fix the cause in that order. Tape or a forced clip can hide the symptom while damaging the board.
Quick Answer
First confirm that the hooks actually match the board. Then use the system’s locking clips, screw retainers, or snap-in tabs, keep the load aligned, and provide adequate clearance behind the panel. A retainer cannot correct an incompatible hook or an under-mounted board.
Start by comparing the options in our Pegboard Accessories collection, then use this guide to read ratings and compatibility details with a more critical eye. The broader Garage Pegboard Storage section also helps place this purchase in the rest of a functional garage plan.
Compare Pegboard Accessories on Amazon after you have written down your required hole size, hole spacing, board thickness, attachment style, and the weight and shape of the item. A short requirement list prevents an attractive feature from hiding a poor fit.
Why hooks lift out
Removing a tool often creates upward and outward force. If the hook is loose in an oversized hole, has the wrong rear-leg geometry, or carries a tool that twists, it can leave the board along with the tool.
Remove the hook and inspect the opening. Enlarged hardboard holes, bent metal edges, cracks, swelling, or an accessory forced into place point to a fit or condition problem. Do not reload damaged components.
Confirm compatibility first
Measure hole size, spacing, panel thickness, and rear clearance. A hook that looks standard may be intended for a different diameter or material. Correct fit usually reduces movement before any retainer is added.
Verify hole shape, diameter, spacing, panel thickness, and hook gauge. The front leg can pass through even when the rear geometry is wrong. A compatible hook should settle into position without bending the face.
See current pegboard accessory choices on Amazon and compare the same fields across several models rather than jumping between unrelated feature lists.
Use the intended locking method
Plastic clips, metal retaining wires, screws, and integrated tabs each work with particular hook and board designs. Install them according to the accessory directions; improvised wire or adhesive can interfere with capacity and removal.
Check the gap behind the board. Angled hooks need space to rotate and seat. Wall contact, misplaced furring strips, insulation, or stored material behind the panel can stop the rear leg.
Change the removal motion
Lift a tool clear of its contact points before pulling it away from the wall. If the tool always catches, move neighboring accessories or choose a holder with a wider opening rather than yanking at an angle.
Observe removal motion. A wrench or cord pulled upward may carry the hook with it. More overhead clearance, a different angle, paired hooks, or a holder designed for the item can keep the load directed downward.
A useful cross-check is the wider Garage Pegboard Storage catalog, because the surrounding equipment can expose a compatibility issue that is easy to miss when the pegboard accessory is considered alone.
Browse more Pegboard Accessories options with those system limits in mind.
Control rotation and leverage
Long or top-heavy tools can twist a single hook. Two-point support, a deeper cradle, or a dedicated rack spreads the load and makes removal more predictable. Place heavy tools lower and close to the panel.
Install only a retainer specified for the hook-and-panel system. Plastic clips, metal tabs, front screws, and proprietary locks engage differently and should seat without stretching a hole or bowing the panel.
Check panel mounting
A flexing panel can make accessories work loose. Confirm proper spacer depth, fastener spacing, structural attachment, and panel condition. Enlarged hardboard holes, bent metal slots, or cracked plastic may require repair or replacement.
Control rotation for wide or off-center loads. Two compatible hooks can be more stable than one central hook, provided both share the load and remain within the complete system rating.
Check Pegboard Accessories specifications and availability only after confirming that the listing identifies the size, rating, and included hardware clearly.
When to replace the accessory
Retire hooks that are bent, badly corroded, cracked, or no longer lock. A few correct holders are more useful than many loose pieces, especially around sharp or heavy tools.
After the fix, test with a light nonvaluable item. Remove and return it several times using the normal motion. Stop if the hook walks upward, the opening enlarges, the panel flexes, or the retainer shifts.
How to Compare a Shortlist Without Getting Distracted
Build a simple comparison table with one row for each candidate and columns for the requirements that can actually disqualify a product. Put hole size, hole spacing, board thickness, attachment style, and the weight and shape of the item first. Add dimensions, included parts, installation limits, warranty terms, and the model number. Leave a cell blank when the listing does not provide an answer; do not quietly replace missing information with an assumption. A product with fewer decorative features but complete documentation is often easier to evaluate responsibly than a feature-heavy listing that hides basic limits.
Next, separate requirements from preferences. A compatible connection, adequate rating, permitted mounting orientation, and safe operating environment are requirements. Color, extra accessories, a remote, or a particular storage style may be preferences. This order prevents a convenient feature from outweighing a mismatch that will affect every use. It also makes price comparisons fair because the remaining candidates are capable of the same core job.
Plan for Ownership, Not Just Installation Day
Think through inspection, cleaning, adjustment, storage, and eventual replacement before fixing a model to the garage. Moving parts, flexible materials, electrical contacts, seals, brackets, and fasteners can all need attention depending on the category. Service access matters. A product mounted tightly behind shelving or above a vehicle may be frustrating to inspect even if it technically fits. Keep the manual and model information where another household member can find them.
After installation, use a calm first-use test. Keep people, vehicles, and valuable tools clear, operate at a light demand, and watch the mounting, connections, controls, and working path. Stop for unexpected heat, noise, movement, leakage, binding, odor, or damaged insulation. A successful light test does not authorize exceeding the published rating; it simply confirms that assembly and basic operation appear normal before regular work begins.
A Simple Buying Checklist
Before ordering, write down the intended job, maximum demand, available space, mounting or storage location, environmental exposure, and every required connection. Confirm that the stated rating applies to the complete assembled product and to the way you will operate it. Look for understandable instructions, replacement parts where relevant, and a return path if the dimensions or interface do not match.
Do not treat customer photos or star averages as substitutes for specifications. Reviews are useful for spotting repeated usability issues—awkward latches, weak guides, confusing instructions, premature leaks, or difficult adjustment—but the model number and manual establish what the product was designed to do. Recheck the listing before purchase because sellers can combine variations on one page.
Shop Pegboard Accessories on Amazon once the checklist is complete, or return to our Pegboard Accessories page to compare the category in context.
Use the Correct Troubleshooting Order
First inspect for damage. Second verify dimensional compatibility. Third confirm rear clearance and full seating. Fourth observe the tool’s removal path. Fifth add the named retainer if the system supports one. This sequence avoids buying locks for a hook that never fit correctly.
When Repositioning Is the Better Fix
A heavy, deep, or frequently lifted item may be poorly suited to a simple hook even when it fits. Move it to a lower paired holder, a purpose-built bracket, a shelf, or another storage system. The goal is reliable workflow, not forcing every object onto pegboard.
Inspect Retention Over Time
Repeated use can loosen clips, enlarge hardboard holes, bend wire, or wear coatings. Add hook seating and panel condition to seasonal garage checks. Replace damaged pieces and investigate movement early, especially where a falling tool could strike a person, vehicle, or work surface.
Do Not Repair the Wrong Part
If several hooks loosen in the same area, the panel or wall mounting may be the common cause. If one hook fails in multiple locations, the accessory is suspect. This simple comparison keeps you from reinforcing one connection while the real problem remains elsewhere in the load path.
Continue the Pegboard Accessories Guide Series
- What Pegboard Hooks Fit My Pegboard?
- Best Pegboard Accessories for Power Tools
- Pegboard Hooks vs Bins vs Shelves
- Metal vs Hardboard Pegboard Accessories
Return to Pegboard Accessories, compare panels in Garage Pegboard Storage, or inspect alternative wall systems in Garage Wall Storage.
Frequently Asked Questions
Is the most expensive pegboard accessory automatically the best?
No. Price can reflect materials, capacity, accessories, or brand support, but the best choice is the model whose documented limits match your job and installation without paying for features you will not use.
Can I rely on a marketplace title for sizing?
No. Titles are shortened and variations are sometimes grouped. Verify the exact model number, manual, dimensions, ratings, included fittings or hardware, and any operating limits before ordering.
How much extra capacity should I buy?
Use the manufacturer’s selection guidance and the demands of the complete system. Sensible margin can help, but arbitrary oversizing can add weight, cost, electrical demand, or awkwardness without improving the job.
What should I inspect when it arrives?
Confirm the model and rating label, examine the housing and working components for damage, inventory the parts, read the instructions, and test operation without exceeding limits before putting valuable tools or vehicles nearby.
When should I ask a professional?
Get qualified help when the installation changes fixed wiring, depends on uncertain structural support, involves code requirements, or operates near hazards that the product documentation does not clearly address.
Final Verdict
First confirm that the hooks actually match the board. Then use the system’s locking clips, screw retainers, or snap-in tabs, keep the load aligned, and provide adequate clearance behind the panel. A retainer cannot correct an incompatible hook or an under-mounted board. The winning choice is the one supported by clear documentation and installed within every stated limit. Compare the complete system, not one headline feature, and plan how the product will be inspected, stored, or serviced after the first use.
For a final side-by-side look, compare Pegboard Accessories on Amazon. The link uses the exact collection-specific destination supplied for MyGarageProducts.com.
Use retention as one step in the complete pegboard layout workflow, which also checks system compatibility, tool shape, reach zones, removal motion, wall mounting, load path, and inspection.